NOTE: I am not at liberty to redistribute the documentation used to build this model.
Detailing and Rendering the Cabin Interior:
Because I concentrate on aircraft, most of my renders have been done from an “outdoor” point of view. With that being the case, I’ve been able to use a single (physical sun) light source and environment. (in clamped mode) This has worked quite well, and kept render times low, even though I’m typically using Monte Carlo. I get good results using only 1 bounce, and Environment Importance Sampling is sometimes used too, depending on the environment background. I’m simply lucky that most of my renders are done in this “outdoor” mode, so I generally have very few render problems.
I’m in the last 20% of this project, and am refining the interior details, so I have a need to do a variety of renders, showing the interior in various day and night configurations, and with various interior lighting settings. Now, I’m basically rendering inside a closed tube, with windows on both sides, which creates some noise issues. If this were a typical “room” render, then I could consider using Portals. But in this case, there are twelve windows, and using twelve portals would be quite costly in render time. And, they wouldn’t work consistently, since this aircraft will be rendered at various times of day.Lighting to consider:
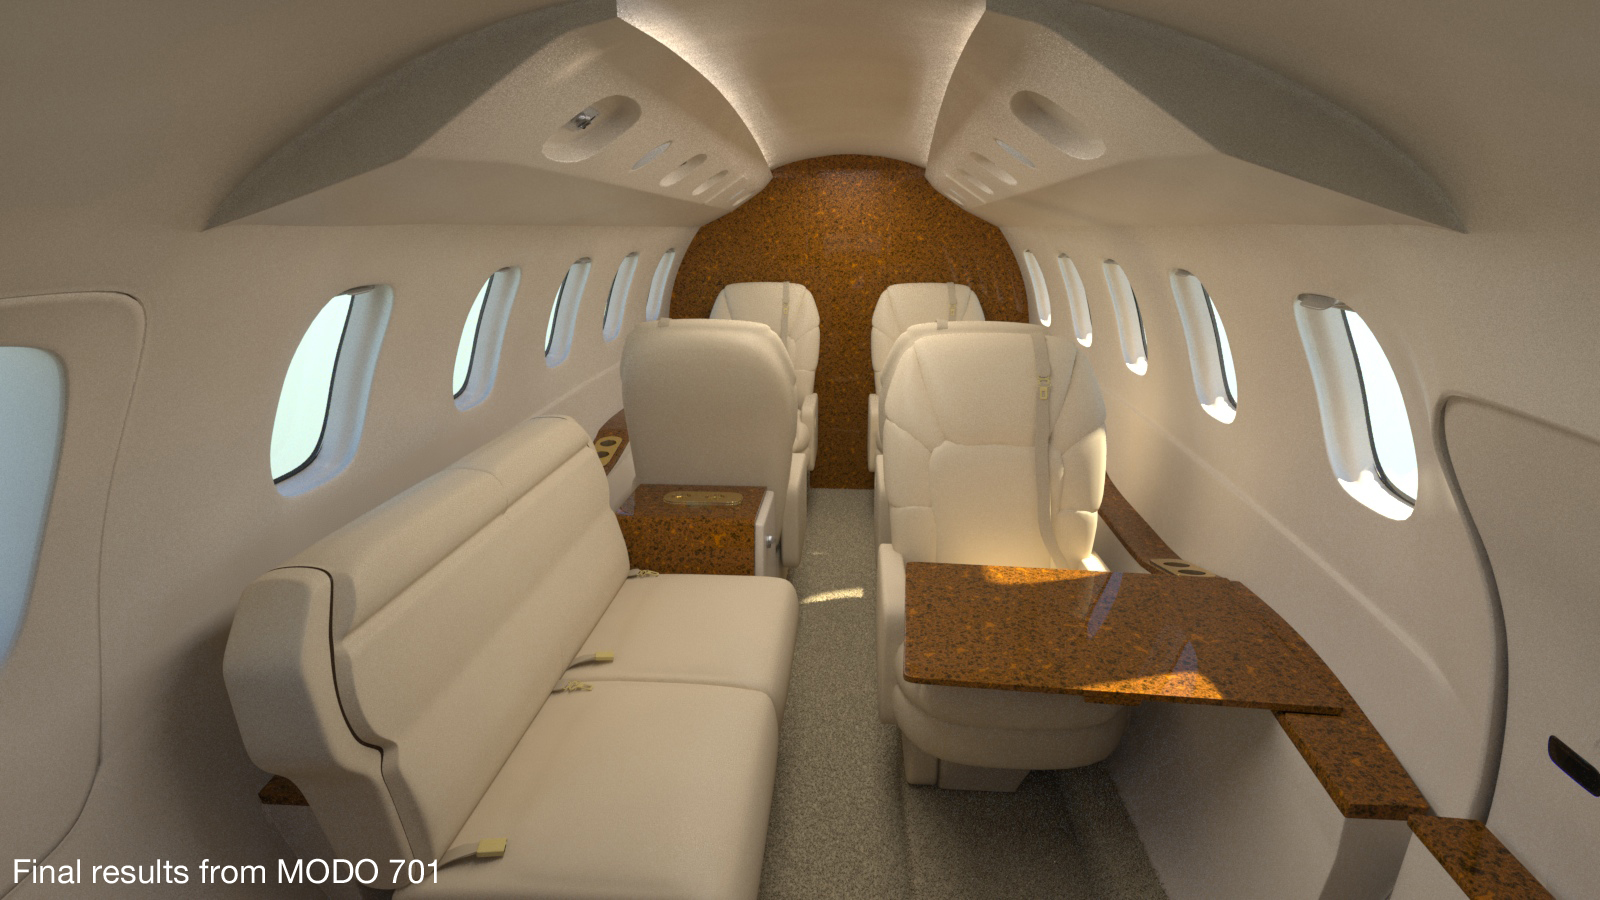
- Lighting outside, coming in through the cabin windows (In these renders, the Physical Sun is set to 10am, and the North Offset is such that the light is located on the viewer’s right side. This is what’s creating the nice “hot spot” on the fold-out table at the front seat position.)
- Overhead “master” cabin lighting
- Individual passengers’ reading lights, laptop displays, etc..
- Light coming from the lavatory area, when that door is open
- Light leaking from the cockpit, both through the windscreen and from the cockpit lights
The main interior parts are in place, but I chose to stop refining them at this point, until I got a working lighting solution working. (The overhead consoles need to be reshaped a bit, for example.) I always turn “Simple Shading” off for all lights. This scene is more complex than it appears, which is part of the reason for their initially-long render times. With all of the geometry details, and animated parts, the cabin scene below is currently rendering about 5 million polygons.
Although Monte Carlo can be used, it would require many more rays to be fired in a case like this, which would result in much longer render times, if the noise is to be minimized, so a combination that included Irradiance Caching seems to be in order. To research this, I reviewed Richard Yot’s “Rendering Interiors” tutorial, which are an invaluable source of information. In fact, I often tell users that if they purchase that tutorial, it will solve ALL of their rendering problems. In this case, the proof that those methods work is quite clear. To put the render times in perspective, the renders shown here were done on a 2011 dual-core (i3) 27-inch iMac at 3.2 Ghz., with 16 GB of RAM. (not a blazing fast system… to be replaced when the new models come out this fall.)
The main message that Richard Yot conveys over and over is that it pays to investigate the cause of each rendering issue one item at a time, rather than arbitrarily cranking up all the settings. It takes some time to isolate what problems are caused by AA samples versus shading rate, blurry reflection rays, etc., but when you’ve tweaked the settings appropriately, the results are clean renders, typically done in much less time than you’d spend if you simply increased all the settings.
Note that all of the renders shown on this page are actually 1600 pixels wide. So, to see any of them at full resolution, just drag them to your desktop.
Rendering in 701:

In this case, I began with MODO’s default settings, and 1 bounce. After a few test renders, I raised the Ambient Intensity setting, to a value of 0.05, which did help reduce the noise a bit, without negatively affecting the render contrast. Looking at this series of renders, you’ll notice that I changed a few tiny bits of geometry as the process went on, (fixing light leaks caused by geometry not quite intersecting, for example) but the main focus is the lighting setup and the render settings. Nothing major in the scene was changed during these tests.
The first thing that became obvious was that there were a few ways to accomplish the interior lighting effect. Aside from the light coming in through the windows, the “master” cabin lighting comes from fluorescent lights mounted above the overhead accessory panels, which creates a soft, diffuse light throughout the cabin. When these are turned off, or to a low setting, passengers have the option of using typical airline-type individual reading lights, which illuminate only their seat area. Those are emulated with small spot lights, and work fine. Likewise, the lavatory lighting is working well on it’s own, (with the door closed, as it is in these renders) so the rest of this discussion is about the overall cabin lighting alone.
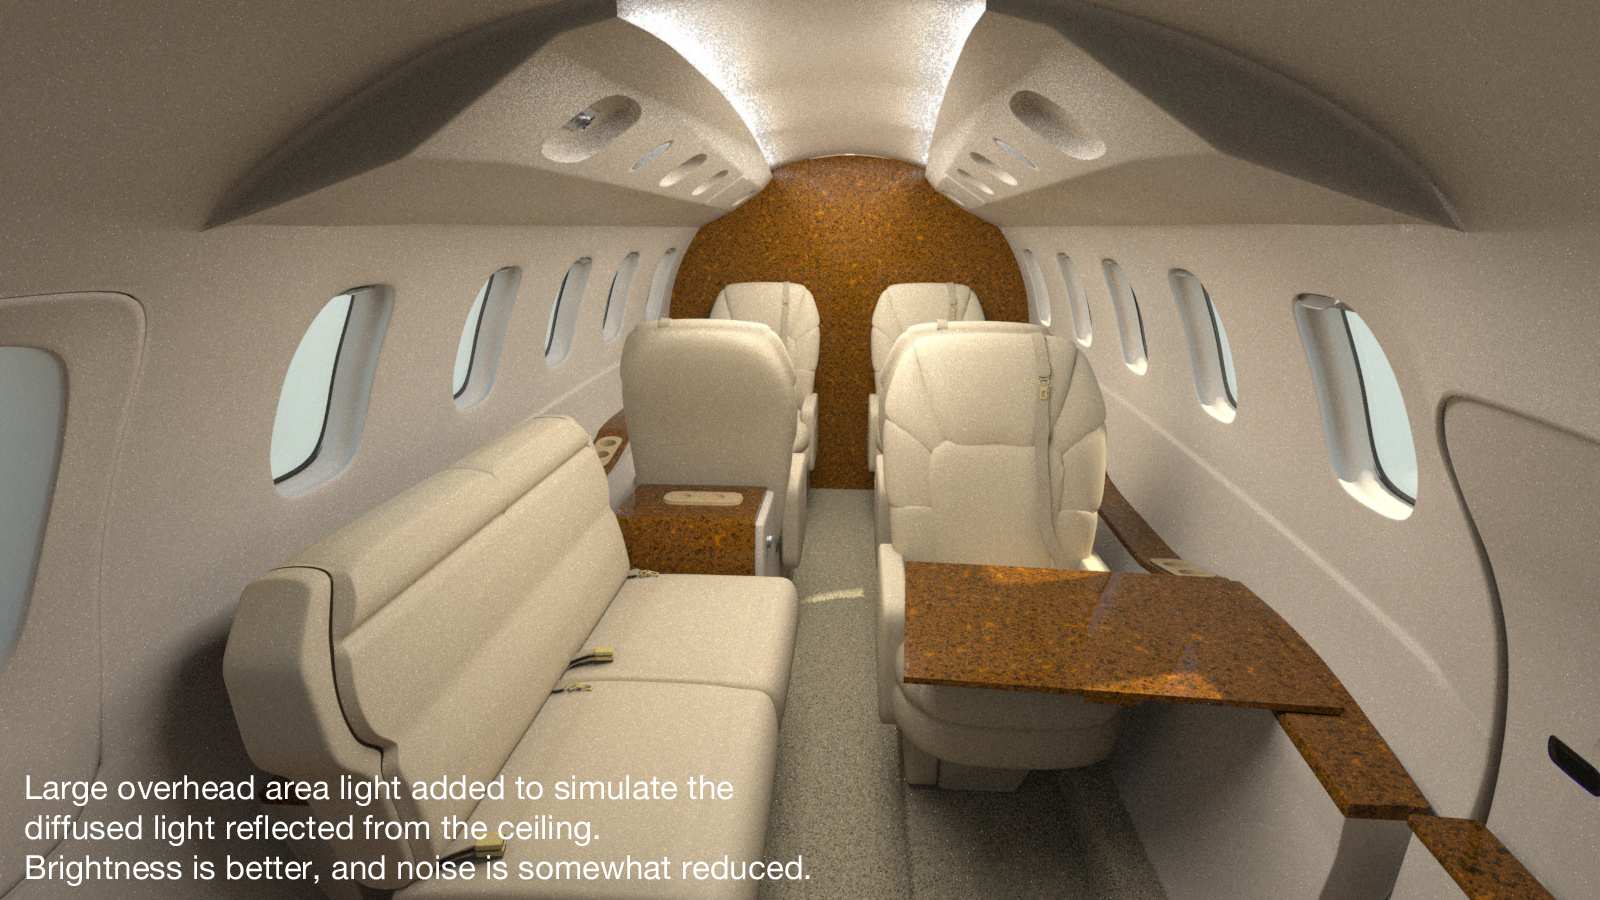
First, I tried a series of cylinder lights mounted in the location mentioned above. This worked well for illuminating the ceiling as on the actual aircraft, and provided some, (but not enough) reflection of that light into the lower portion of the cabin. To simulate that, I used a cabin-length area light, located near the ceiling, and pointed straight down. This gives the lighting effect desired, but of course, it started to introduce noise, especially in those corners where the Irradiance Cache was having trouble seeing those rays.
Antialiasing samples were increased to a moderate level (64 samples) and in the Global Illumination tab, the rays for both Ray Tracing and GI were increased to 128. That helped somewhat, but noise still remained. One result that became obvious rather quickly was that at least two bounces would be helpful for both the realism and the noise reduction, and as many as four were tried at times. During these tests, render times varied from 2 hours to over 16 hours, for various sampling rates, shading rates, number of bounces, etc. None of the renders that took under 6 hours was good enough, due to the noise, and the settings that would have produced render times in the 12-hour range or higher were considered impractical.
Here’s where I started using Richard’s methods, and isolating the problems, one by one. The main material visible in the cabin is the main cabin liner, which at this time is emulating a molded plastic-type material. (Some aircraft have custom fabric-type materials, and I may try this later.) So, that material was moved above the base shader and given it’s own custom shader, with a higher shading rate. That helped with render times, because I could lower the other global settings.
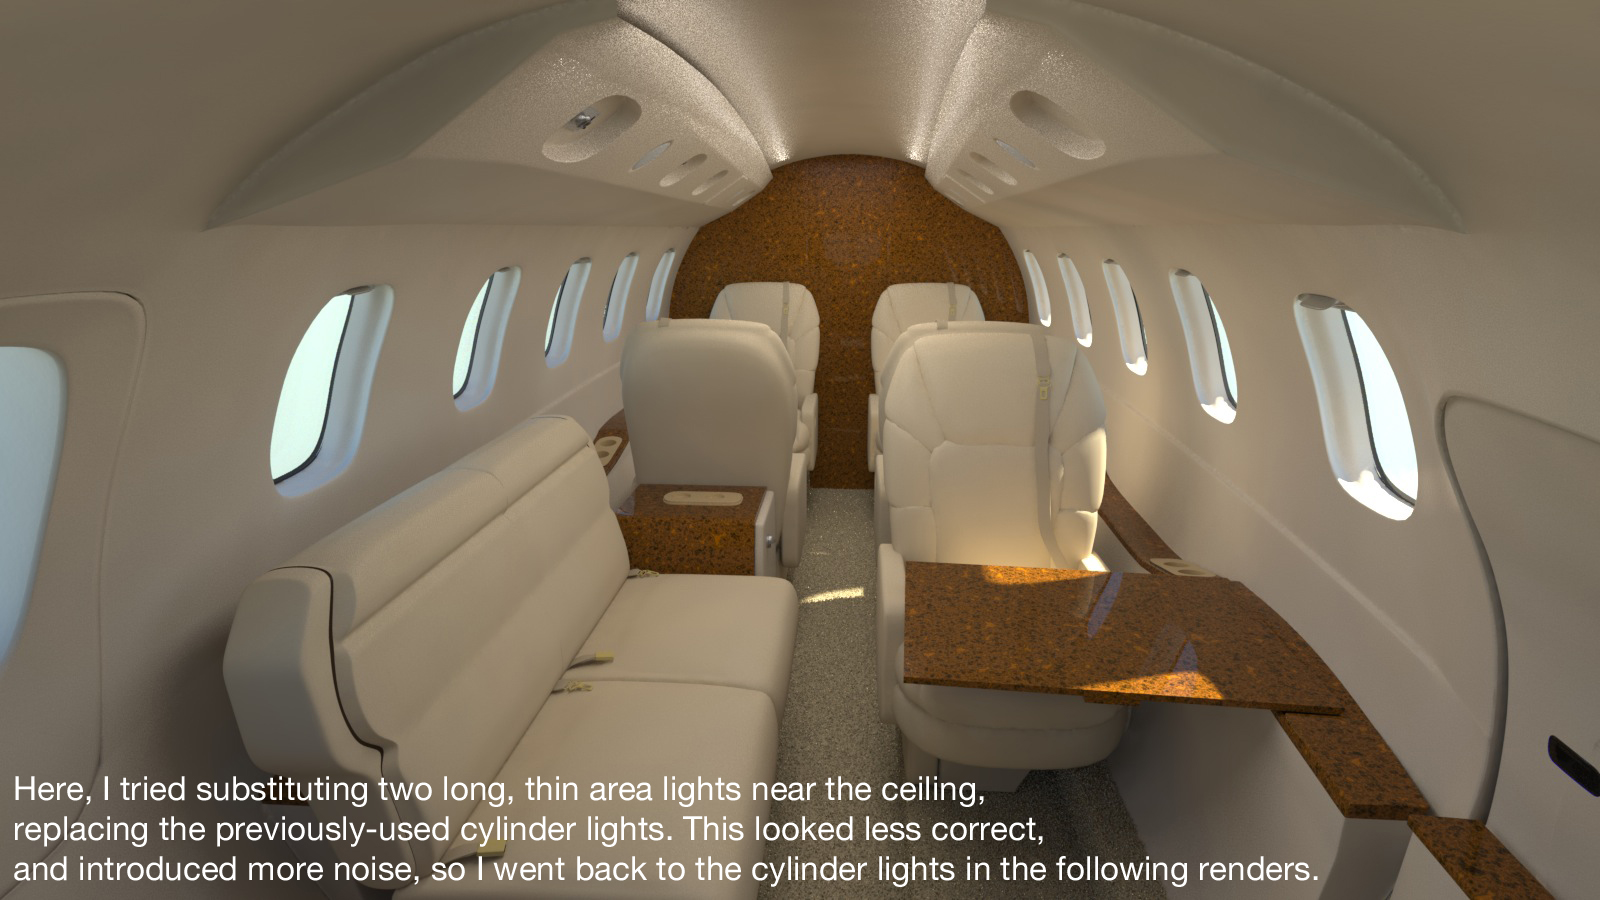
After several renders testing the results, I decided to eliminate the multiple overhead cylinder lights, and instead, use a single, long one on each side of the cabin, near the ceiling. This gave me fewer light sources, which meant fewer rays to deal with, and in turn, slightly lower render times. Samples for the main cabin area light were increased to 128, which helped to reduce the noise a bit.
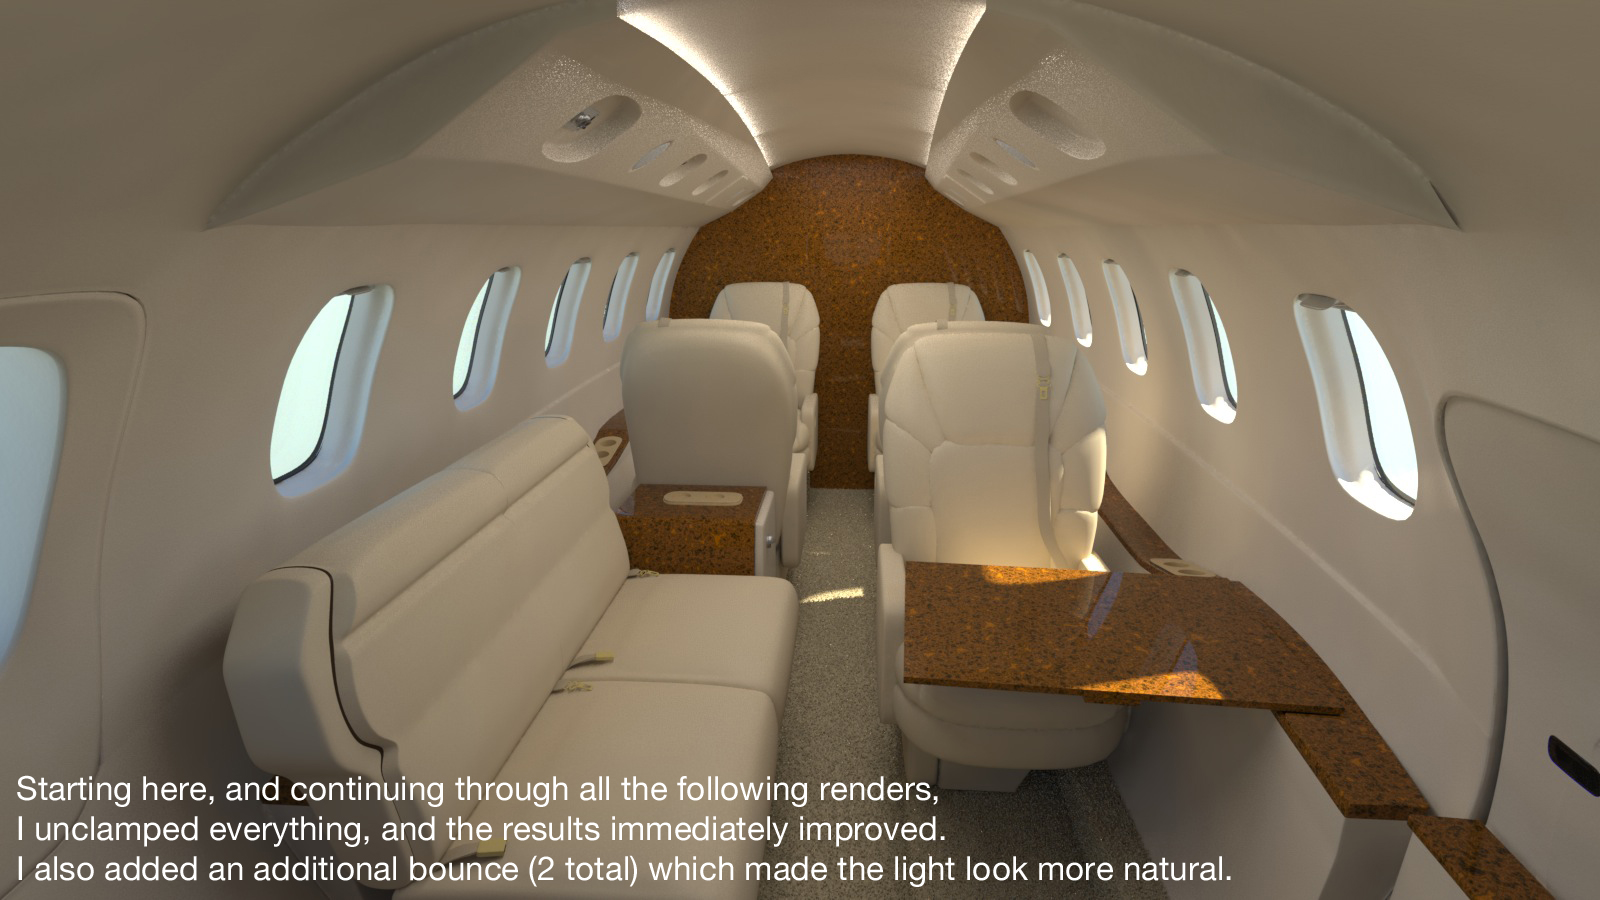
At this point, I decided to try unclamping everything, and this helped quite a bit, both with the realism, and the reduction of noise. I was very close at this point, with the only major noise remaining at the transition area where the IC was having a tough time, because there wasn’t quite enough light from either the overhead ceiling-area lights, or the downward-pointing one, which was the main light source. The render time was at about 8 hours, at 1600 X 900. Of course, I wish it was 8 minutes instead, but considering the system it was rendered on, all the options I had tried, and comparing this to known solutions for similar-case architectural-type interior renders, I think thought was pretty good.
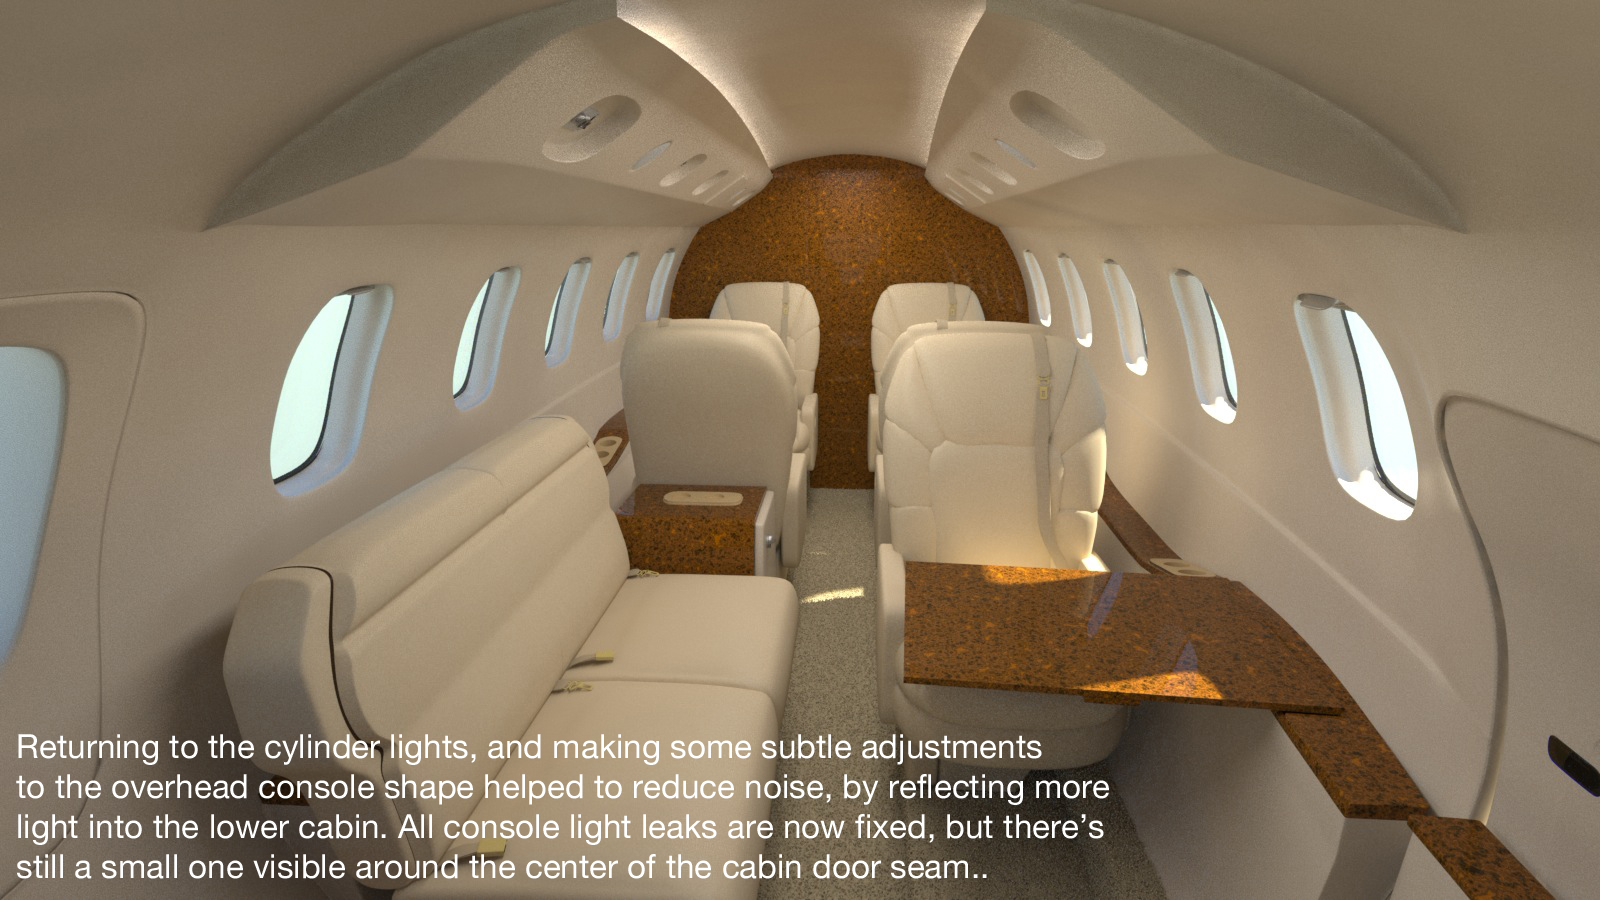
By decreasing the GI rays from 512 to 256, and decreasing the cabin liner material’s custom shading rate to 0.001, the final bits of noise were lowered to an acceptable degree, and the render time was reduced to about 3 hours. I was quite pleased with the render done with the cabin lighting off, too. It’s not perfect, but it’s very good, in terms of noise.
After turning the lights back on and making some minor adjustments, there were a couple of “hot pixels” in the carpet, and at first, I was confused by this, since I was only using a physical environment, and not an HDR image. It then occurred to me that it might be something to do with the fur length on my interior carpet. I changed it from 2 cm to 1 cm, which had no visible effect on my perception of the carpet, but it did eliminate the hot spots. (Perhaps a couple of stray fibers were simply catching light.) At the same time, I reduced the carpet’s render density from 1500% to 1000%. Again, this produced no visual difference I could see, but should reduce the render times slightly. These small tweaks aren’t much on their own, but they’re worth doing, since they all add up at the end.
An interesting test…
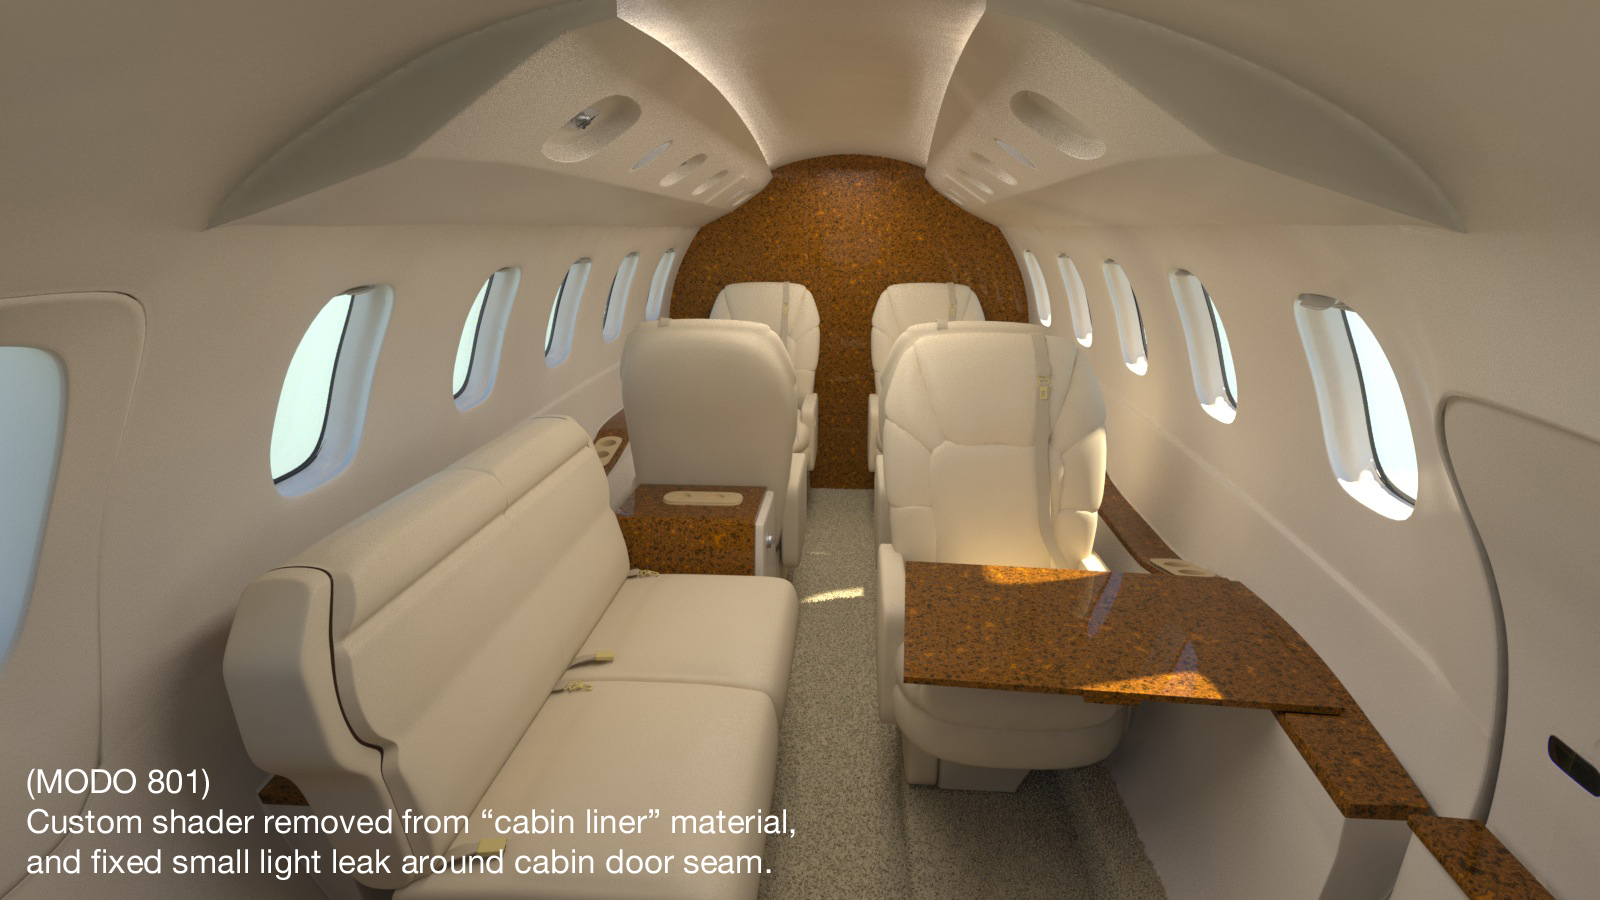
While reviewing Richard’s tutorials, I re-heard the message that the Shading Rate should only be adjusted for those materials that have a texture applied. I suddenly realized that my “cabin liner” material only had a basic material, along with a noise layer for bump, and so it was pointless to have a custom shader for it, with an adjusted shader rate. I removed the custom shader and returned that material to where it started, below the base shader.
However, as soon as I did this, noise started to appear in the dark corners of the image. So, I restored this custom shader, and the high quality returned. I can’t explain this, but later, after tweaking other adjustments, I once again removed this custom shader, and retained the noise-free quality.
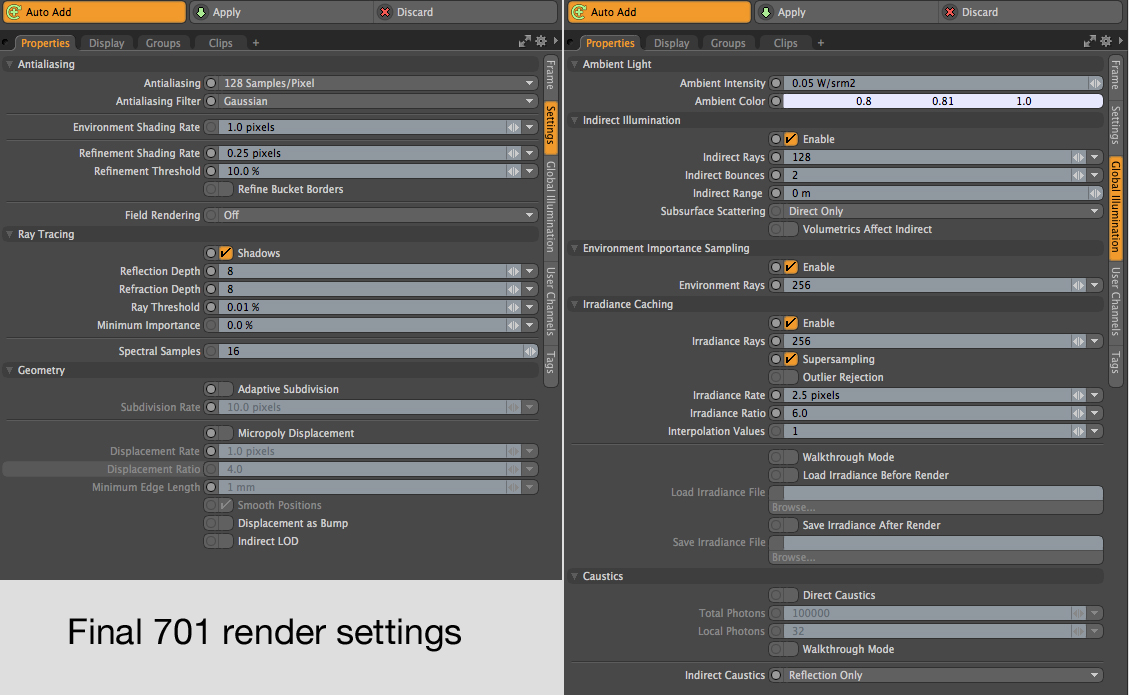
It looks like my best render time for this level of quality in 701 will be about 5 hours, 14 minutes. Here are the final 701 settings. (NOTE: Environment Importance Sampling is shown enabled in this screenshot, because I did some tests with HDR images. But, for the renders you see here, a simple physical sky was used, and EIS was "off".)
Rendering in 801:
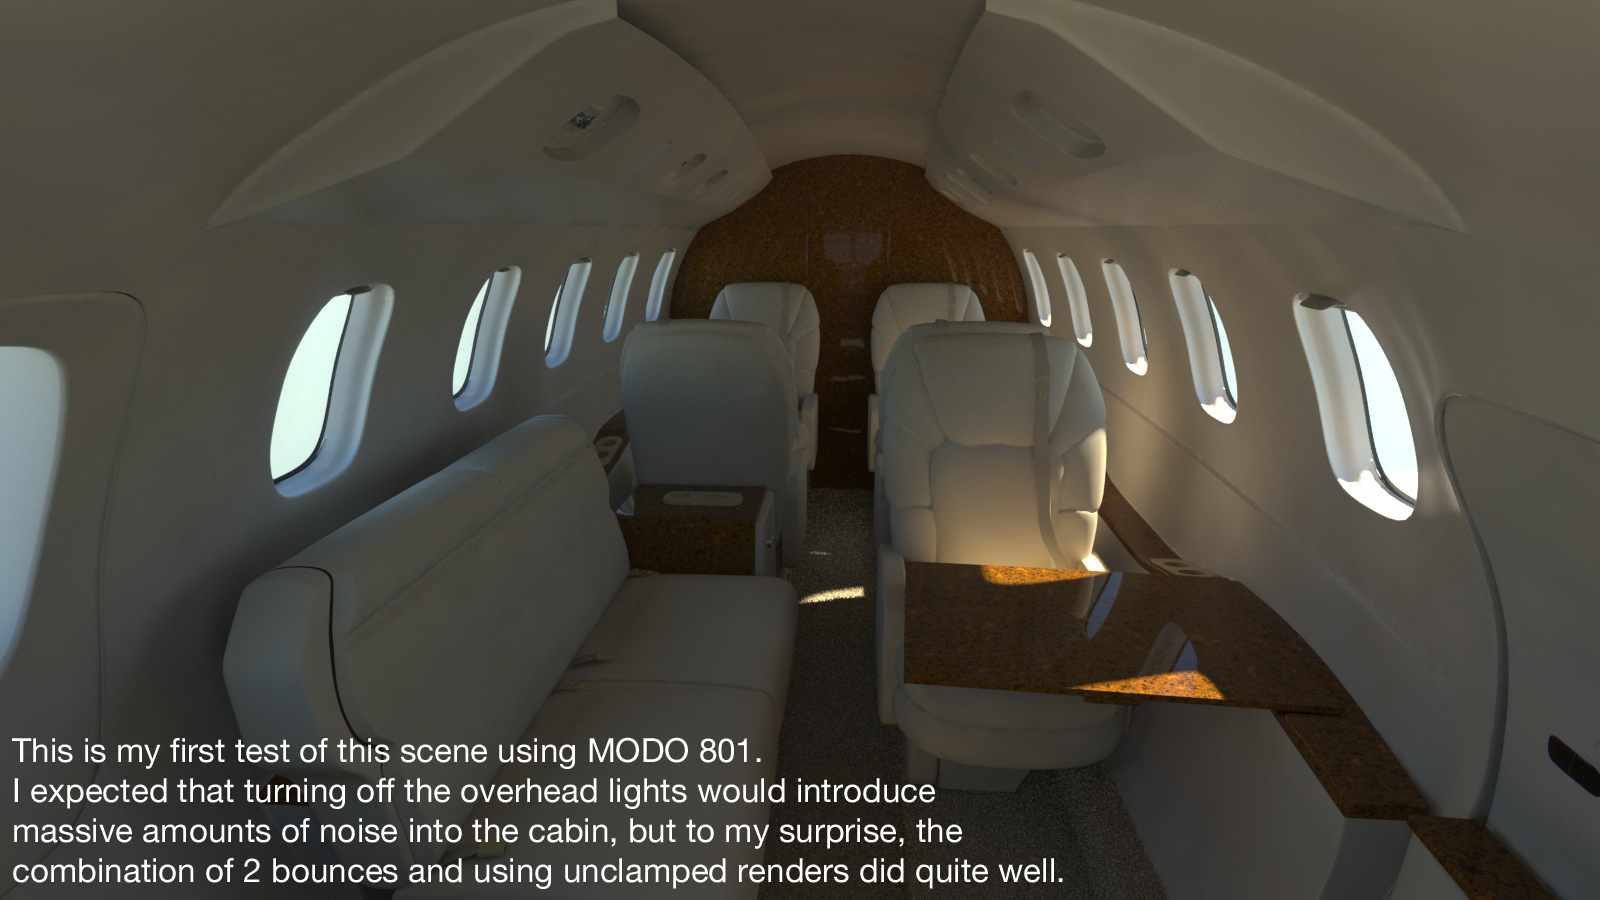
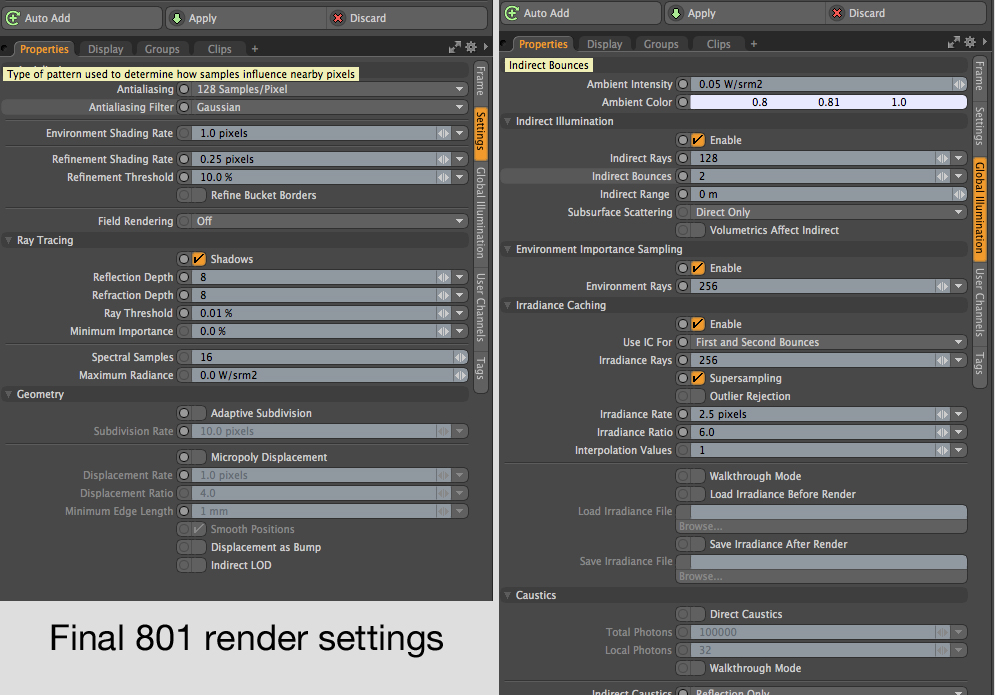
Using a small render region on this image, I compared the three versions of 801’s new “Use IC as” options in the Environment Importance Sampling”. Using IC for either the “first bounce only” or “second bounce only” resulted in a 5-minute render time. By switching to “both”, (which emulates what 701 does) the render time dropped to 1 minute, so that’s the option I chose for the final settings. I was quite pleased with the render done with the cabin lighting off, too. It’s not perfect, but it’s very good, in terms of noise.
Some final tests…
The area lights in my cabin scene were intended to simulate the cabin lighting, and not to create specular highlights. In fact, any specular highlights from that area light would probably only be visible would be in the shiny wood material. Still, it was worth a test to see how turning on the “visible to reflection rays” setting might affect the scene. After a test render that showed almost no change, I turned that option back off.
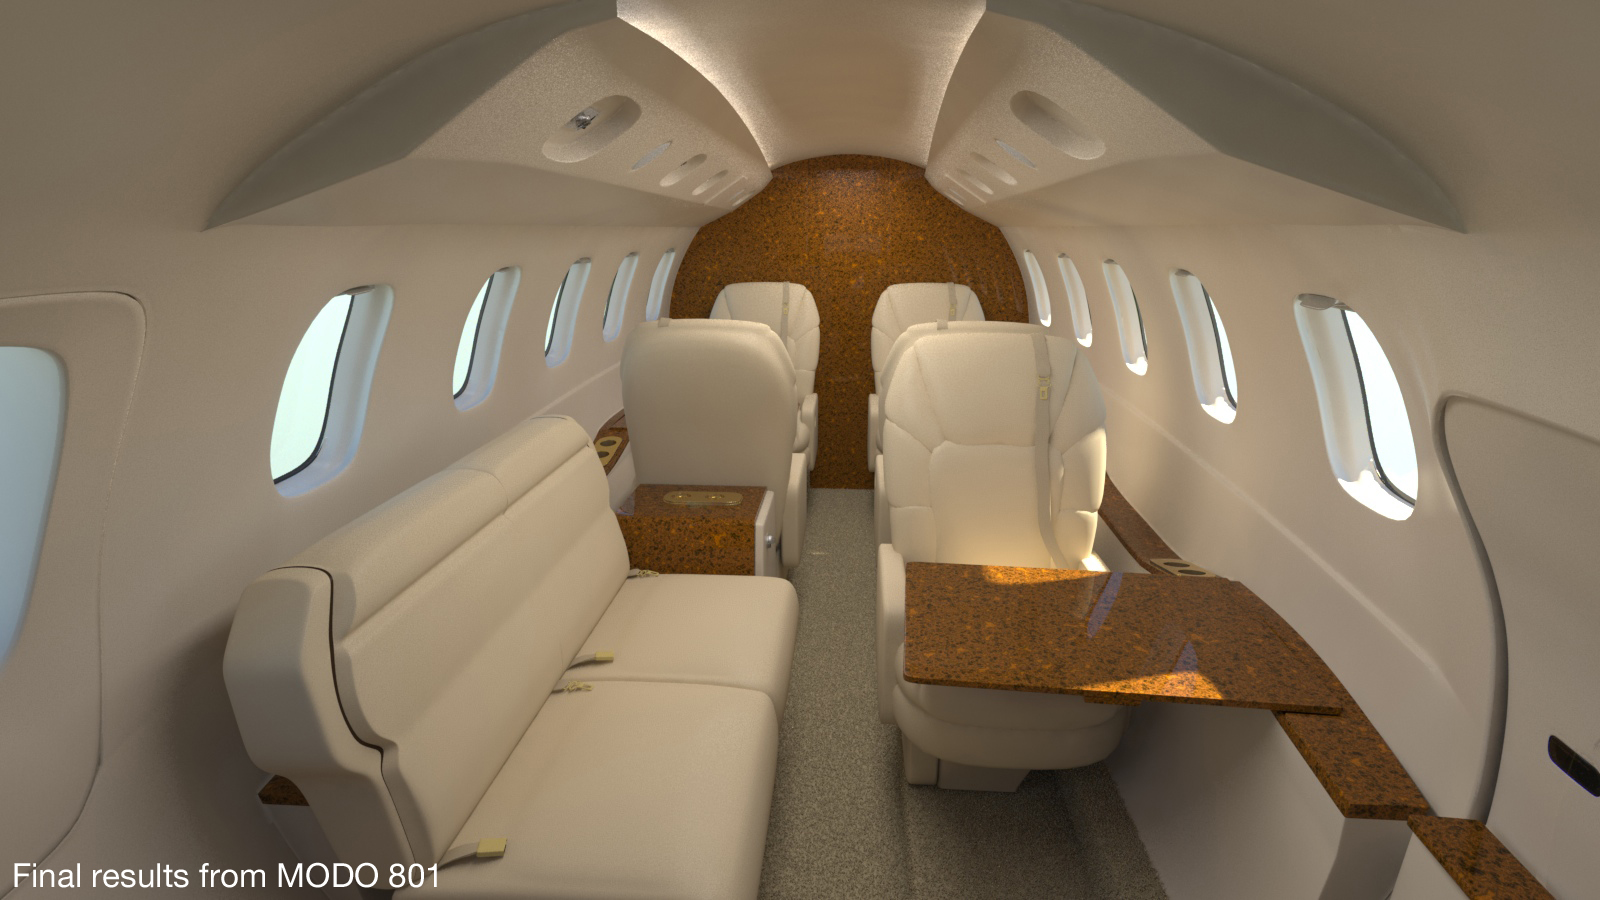
The final 801 render in this series had a render time of 4 hours, 12 minutes.
Comparing the final 701 render to the final render shows that while the 701 render took an additional hour. (about 24% longer) Both renders have their good and bad attributes, with no clear “winner” in my opinion. Here are the final 801 settings. (NOTE: Environment Importance Sampling is shown enabled in this screenshot, because I did some tests with HDR images. But, for the renders you see here, a simple physical sky was used, and EIS was "off".)
Summary:
So, thank you again, to Richard Yot, for providing a huge amount of very specific information, which helped me solve this problem. As time goes on, I may be able to refine it further, but regardless, I now have a nearly noise-free lighting solution that will work, and can move on to finishing the modeling details.
Rigging update - August 14th, 2014
Quite a few things were added and/or refined during this process. Here's a video showing the current rig. (about 311 mb MP4)
Click the "Page 05" link below, to continue.