The "D. B. Cooper" Project.
NOTE: I am not at liberty to redistribute the documentation used to build this model.
Lots of lighting issues to consider:
Lots of lighting issues to consider:
The biggest compositing challenges are not so obvious, when you look at the images I rendered for this article. Some of the scenes I create will be alpha-masked for compositing into pre-shot background plates, while other scenes will be entirely CG. To match the photographic lighting, it's important to be careful in the selection of proxy background plates and lighting, and the choices made in the use of Global Illumination. (referred to from now on simply as "GI") For those of you new to GI, it's a function that allows background images and luminous polygons to serve as lighting sources for the scene, either in addition to, or in lieu of normal 3D lights. Whether those background plates are visible to the camera or not, and whether they include the addition of reflections, refractions, and indirect rays, are sub-toggles within GI. As you can imagine, using it also adds render time, and can introduce noise.
For still images, you could simply find (or shoot) a suitable background plate, turn on GI, and render the shot. I'd probably add some sort of Sun/Moon light for shadow casting, as well as a "shadow catcher", if the mask was for a ground-based shot. (also alpha-masked for compositing) The aircraft would then show the appropriate colors and reflections in the reflective surfaces, and the alpha'd shadows would work on the composite backplate. The parts I create for this movie call for two different types of lighting. For the entirely-CG shots, I need to create the entire 3D environment myself. It might be a simple sky, or it might include clouds, and these things need to show some movement, as you'd see it in real life. The shots that will be composited couldn't use GI, as it would give away the mismatch between my environment setup and the environment used in compositing. Instead, I'll have to carefully light those using another means, with less-specific things visible in the reflections.
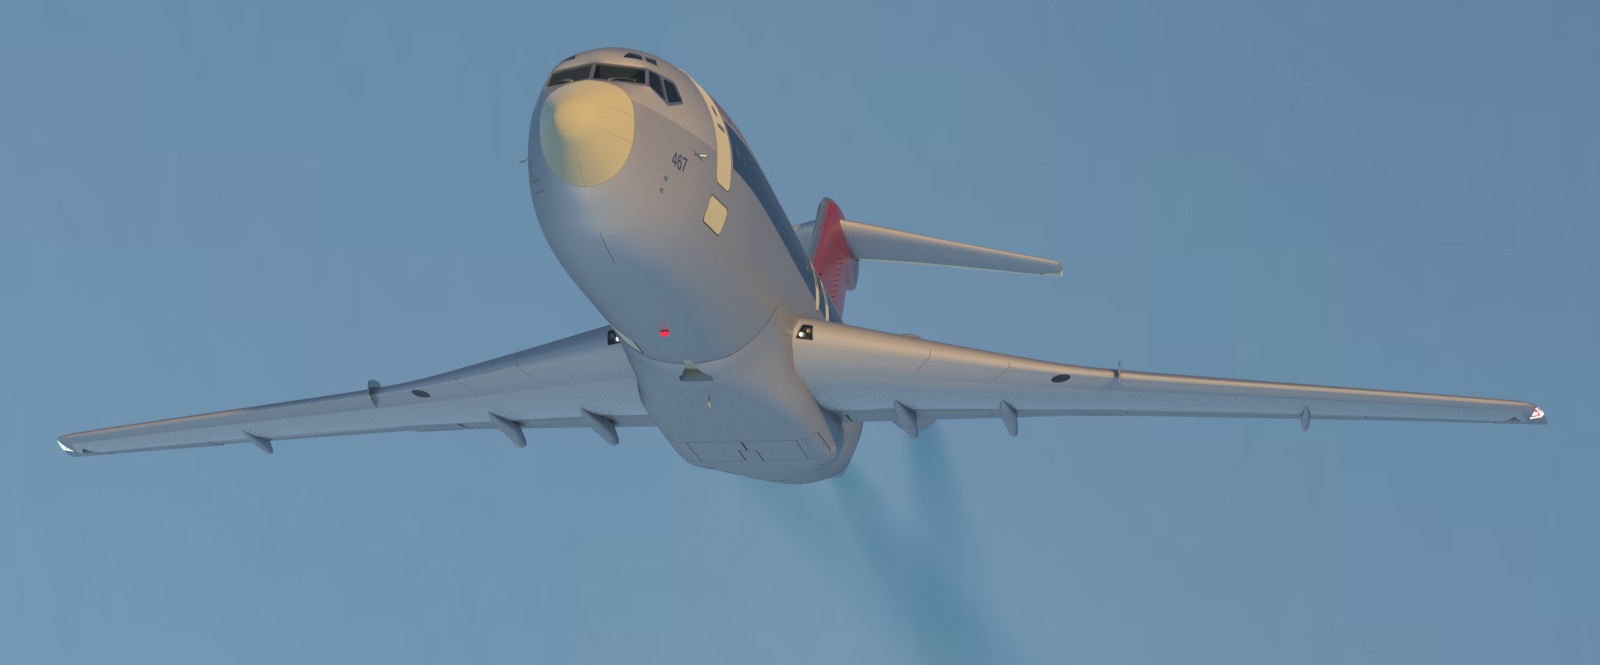
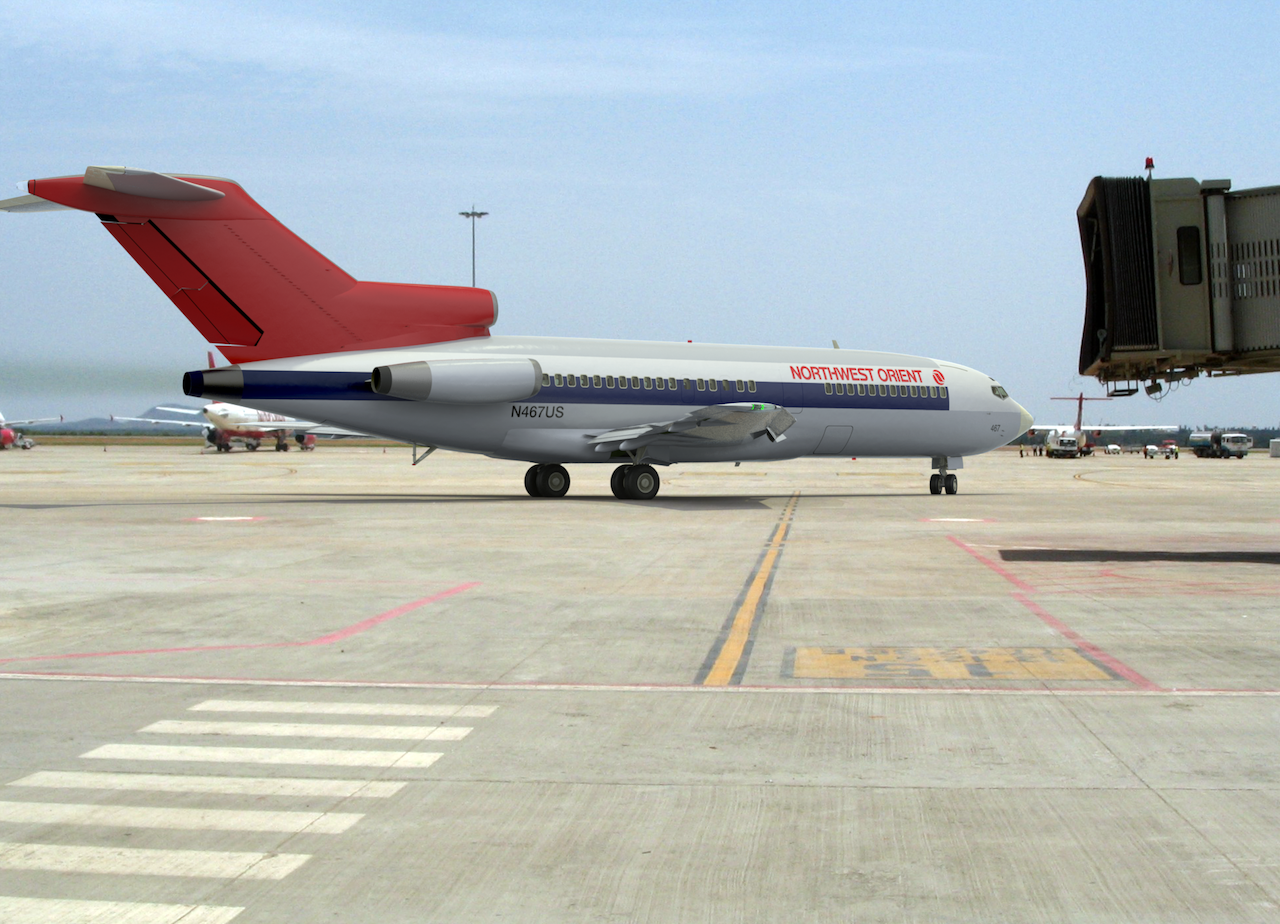
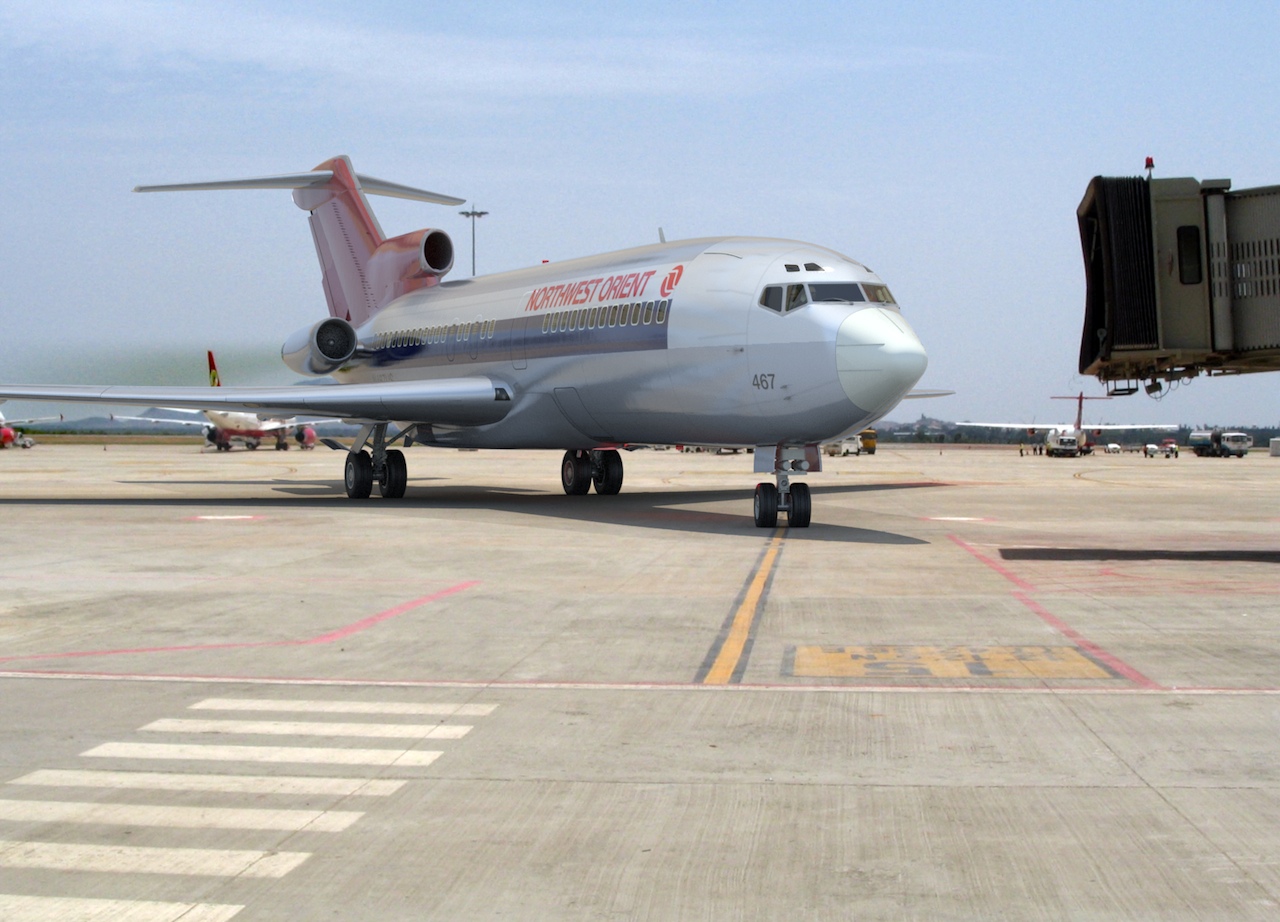
As an example, here are two identical renders, with only one setting changed between them. The first render is with GI turned off, and the second one has GI turned on. The second render is more realistic, because the aircraft is reflecting the environment. You can also see that because MODO's "physical sun" model is used, the amount of yellow, in particular, changes from one render to the next.

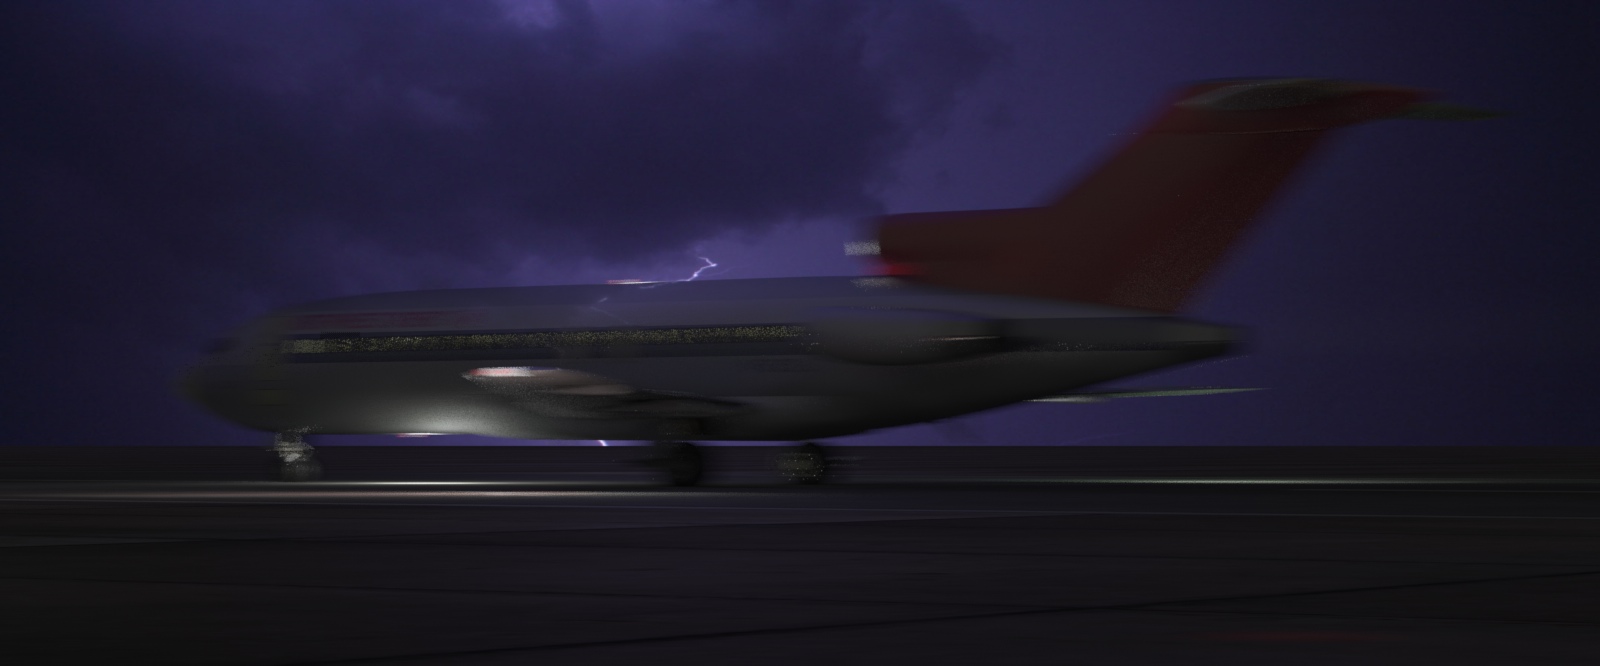
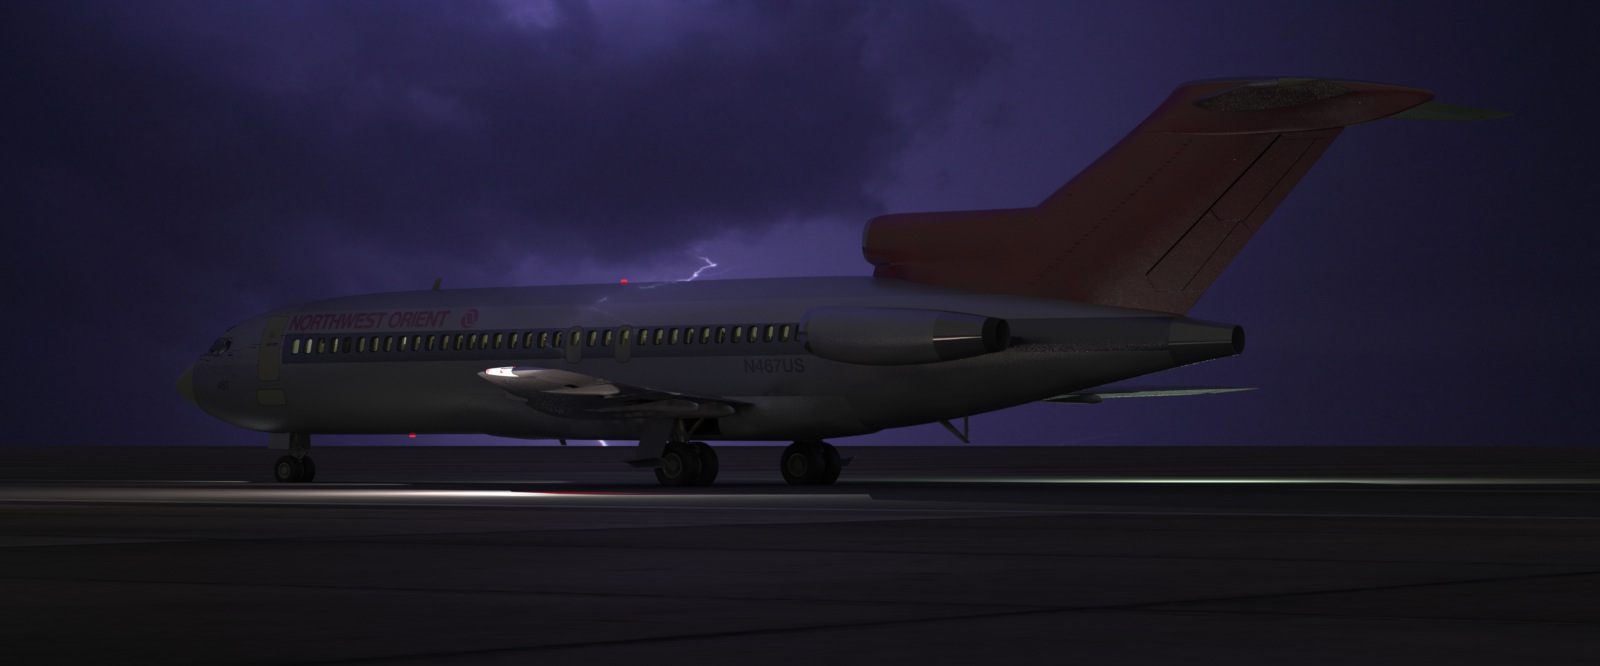
Motion Blur:
In the movie, the aircraft's movement will be obvious, seeing it against the background elements, the runway, etc.. So, the decision on whether or not to use motion blur is subjective. Certain cameras, used certain ways, (panning with the aircraft or not, for example) might not produce it at all. Or, the background might be blurred, while the aircraft remains in focus.
Here are two identical renders, with only one setting changed between them. The first image has motion blur turned on, and the second one does not. This is a depiction of the aircraft landing, so speed was calculated as 120 mph, or 176 feet per second. There's a huge difference in the renders, so these things have to be shown to the production team. (in brief animations, not still images)
Geographical Location, Date, and TIme:
In the interest of authenticity, something else was considered, regarding the lighting. We know where this incident took place, and that it was on November 24th, 1971. One of MODO's cool functions is the ability to realistically set up a sun (or moon) light that physically matches the location's latitude and longitude, as well as the correct angle for the time of day. So, knowing the compass headings of the runways at the airports in question, it was possible for me to set up those runways, set up realistic lighting, and then inform the production team about it, so we could match those angles. For example, if the aircraft is flying north, we know the sun will be on the aircraft's left, and if the aircraft is flying south, the sun will be on the aircraft's right. Since it was in November, we know that the sun would be low in the sky, even in the earliest parts of the movie. (around 4PM) That's interesting, as you'll see in the fly-around move below.
The movie below is an example of the lighting conditions on that day, and was rendered for my own use, to spot problems before beginning compositing. Often, a fly-around like this will point out things about the model and it's lighting that you might miss otherwise. In fact, some problems only exists at one tiny angle, so it's worth discovering them in advance. (The runway and background here are just proxy parts, and not important.)
In the movie above, the aircraft is facing approximately north, with the camera doing the moving. The first thing you'll notice is that because the sun is low in the sky, there's a dramatic difference between the lit side and the unlit side. You can see the full range of tones, from a warm orange on the lit side, to a bluer "cold steel" look on the unlit side. It's also obvious, from certain angles, that the aircraft has no passengers. Attention is drawn to this fact by the reflections on the wings, and had to be fixed. Next, I noticed that the separate pieces of the center engine fairing were showing, due to some material changes that happened when I added the Northwest color scheme. (Later, I changed this seam to a vertical one, as on the actual aircraft.) The landing lights, at the wing's roots, need to be aimed lower, and slightly outward, and were corrected. During the project, I kept a running "changes list" of details like that, noticed in various tests, and fixed them one by one.
Jet Exhaust
In 1971, aircraft engines didn't burn fuel as cleanly as they do today. Depending on weather conditions, it was quite common to see exhaust smoke coming from the engines. So, I rigged a method of simulating that, and also made it possible to switch from a dark-colored smoke, as you can see below, to a lighter-colored smoke, to be used in high-altitude and night shots. The density of the smoke is also variable, for those different conditions.
To keep the render times down for this low-res test, I placed the aircraft nearly out of the frame, and shot it from a static viewing angle. Also, this version is only a one-second loop, and not the continuous effect you'll see in the movie. So here, it looks a little "flashy" or "jittery", but when viewed in continuous motion, against a varying backdrop, as you'll see later, it looks much more authentic.
The low-res test below shows the aircraft as the engines spool up, just before the start of takeoff. You'll notice that the darkness of the jet exhaust increases as the speed increases, so it's quite dense when the plane moves away.
Phase One Complete.
This aircraft is now "movie-ready", meaning that all of the things you can see, (paint, lighting, etc.) as well as the animation controls, are now all rigged, and functional. The next step would be to make several copies of this master file, and then customize each version to match the time of day, flight configuration, etc., to be used in creating all the separate movie scenes.
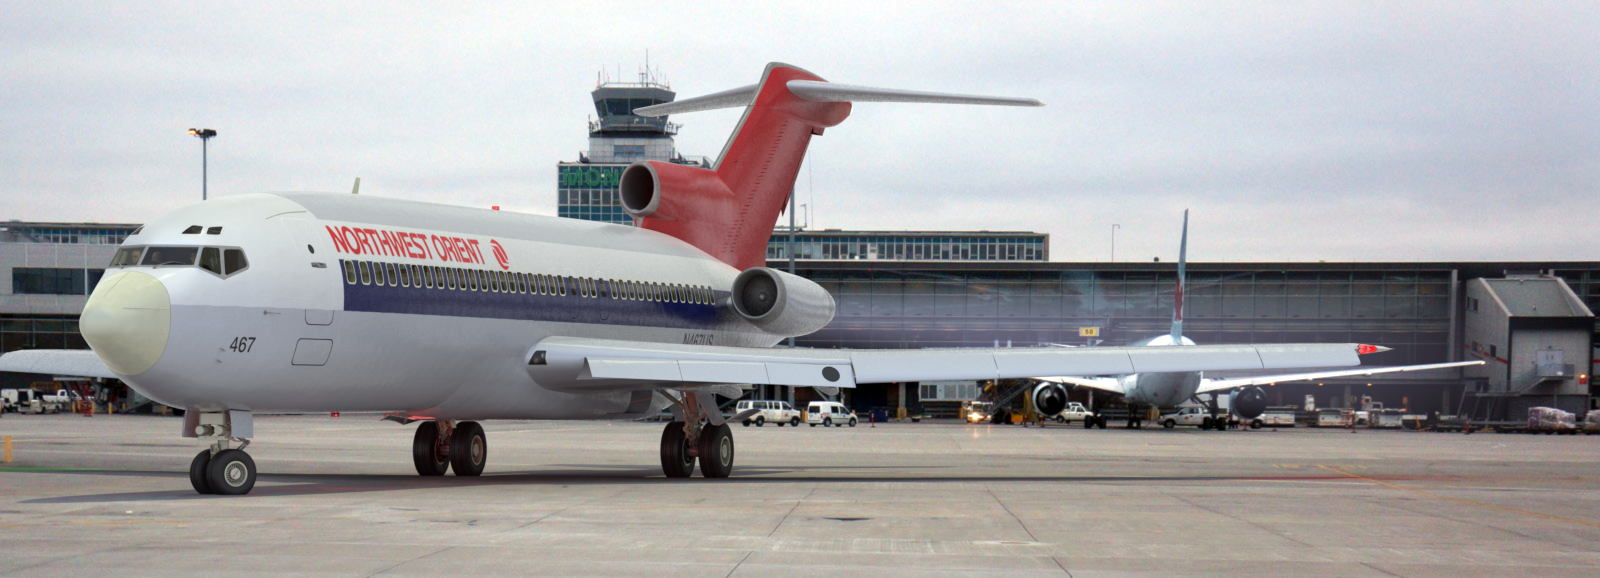
Below - Some composite shots of the model, ready for takeoff...

I don't expect to continue with this project, unless the opportunity comes up for another film on the subject.