See the Products page for info on ALL of my 3D tutorials.
$50 -Available for direct download now.
MODO's development:
As MODO's capabilities have increased over the years, there are now several distinctly-different workflows possible. Some of those are:
- Model in traditional hard polygons.
- Although not widely discussed, we can still build models by patching spline cages. (useful for creating multi-res versions of models)
- Use sub-d, in either MODO's native version, or the Catmull-Clark ("Psubs") algorithm, with edge-weighting.
NOTE: It's important to note that edge-weighting isn't yet fully-supported in other applications. Pixar's "OpenSubDiv" format is gradually being adopted by major software manufacturers, (Maya, RenderMan, Mudbox, Houdini, 3D Max, and any solids exported via the "Power SubD - NURBS" plug-in) but you should check the output format you intend to use, before depending on edge-weighting. - Use the "Power SubD - NURBS" plug-in to export Catmull-Clark models to applications like Solidworks and Rhino.
- Use the "MeshFusion" plug-in to export very nicely-fused parts as single meshes. These are especially good for STL output. ("3D printing")
Knowing something about each of those workflows can save you a lot of headaches at the end of your project, especially if you intend to export the files to other formats. That's the focus of this tutorial set. I'll show real-world examples of how each method has it's place, and what the critical differences are. A lot of emphasis is based on the idea of using Catmull-Clark ("Psubs") geometry, because of all the approaches mentioned above, it's the most versatile and 'future-proof", at this time. I chose an extremely detail-oriented project as the example, because it makes the most of MODO's tool set, and the files can be used to export in practically any format.
This tutorial uses my new 2014 Piaggio P180 "Avanti II" as the prime example, and provides lots of tips to help enable you to build your own high resolution models.
Why use this approach?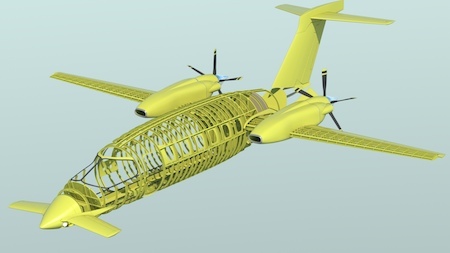
Simply put, any model with a fixed polygon size has a limited shelf life. With today's increasing monitor, TV, and movie resolutions, it would be helpful to have models that are more future-proof. If you build a model entirely with Catmull-Clark surfaces, ("Psubs", in MODO) you can increase the resolution at any point in the future by simply increasing the subdivision level. This holds true, even if you're exporting hard-poly models, since you can take the same step before freezing the model.
You might also appreciate this sort of modeling technique for the simple challenge of creating all-quad, sub-d surfaces. Today, some people feel that it's a more "pure" form of modeling, because of it's versatility. Whatever your reason for being interested in this approach, I try hard to solve the common problems, as well as address many advanced techniques for building detailed structures in a sensible way that will stand up to scrutiny. From the start, this particular project was designed for close-up renders, assembly, and disassembly, so there are very few shortcuts or "cheats" used. If you've seen my previous articles and tutorials, you know that for many years, I've supported the idea of prototyping models in sub-d, and then freezing them to hard polys, in order to use boolean cutters. That approach is still completely valid when you're facing a short deadline. The methods used in this tutorial are completely different, and the entire project is Catmull-Clark, from beginning to end.
Some of my favorite fellow artists have created step-by-step tutorials, in which you build a particular model, just as they built it. Clearly, some people like that approach. But when I watch these, I never build the model shown. Instead, I try to learn the methods, and apply them to my own work. So, as with all my previous tutorials, this one is aimed at showing you the methods and the results, but is not a "step-by-step" tutorial that ends up with you having built the same model I did. That's not the point. Learning the "how" is much more important than the "what", and so while many files are included for you to use, the P180 model itself is not. The methods shown in this tutorial can be applied to any modeling task, so have fun with it, and go in your own direction.
Preview movies of the P180 Project:
NOTE: Most movies contained in the actual tutorial are 1280 X 720, with sound. A couple of them are 1920 X 1080, for extra clarity. when discussing details in the Item list.
Click here for a brief preview movie, showing where this project is heading. (About 34 mb MP4 - Opens in a new tab)
Here's a mid-project movie of the model as it stood on August 10th, 2014. (About 310 mb MP4 - Opens in a new tab)
Meet our new best friend, "MeshFusion". I've included a variety of examples showing some of the potential of this new magical plug-in. I'm also working on a "kit" for MODO users which is a set of all-quad, sub-d meshes suitable for kit-bashing your own aircraft and spaceship models, all designed to play nice with MeshFusion. I'll try to make it available in early 2015.
See The Foundry's MeshFusion page here.
Here are three example movies from the tutorial:
- Key framing from your pop-up control panel
- Stencil masks, Render Booleans, and MeshFusion
- Setting up a simple landing gear rig without complex kinematics
BONUS!
Part of my income is derived from the sales of the 3D models you can find in my 3D Catalog. The Piaggio P180 Project shown in this tutorial is destined to be part of a larger project not disclosed yet, and so i can't provide it to you here for free. But... I'm providing my largest, most-complex model instead, which I hope you'll appreciate, exclusively for MODO users… my completely rigged Boeing 747-8 “Intercontinental” model. The current version of this model sells for $400 in my 3D Catalog, so this is a substantial “add-on”, for MODO users only.

This model is 120 mb in native (701) MODO format, and all of the rigging features are accessible via the typical MODO pop-up “HUD”-type controller. This model is completely rigged for animation. A full feature list is here, and the original follow-along article begins here. Of course this rig will work fine in MODO 801 too.
This model, which is a combination of hard polys and sub-d parts, also includes folders with many parts used in the early stages, including my original sub-d parts, the boolean cutters, etc., so you can see how things were done, and even rebuild your own version, if you like.
Parts of this model were recently (as of June, 2014) featured in four different publications. (See the thread here.)
Other files included:
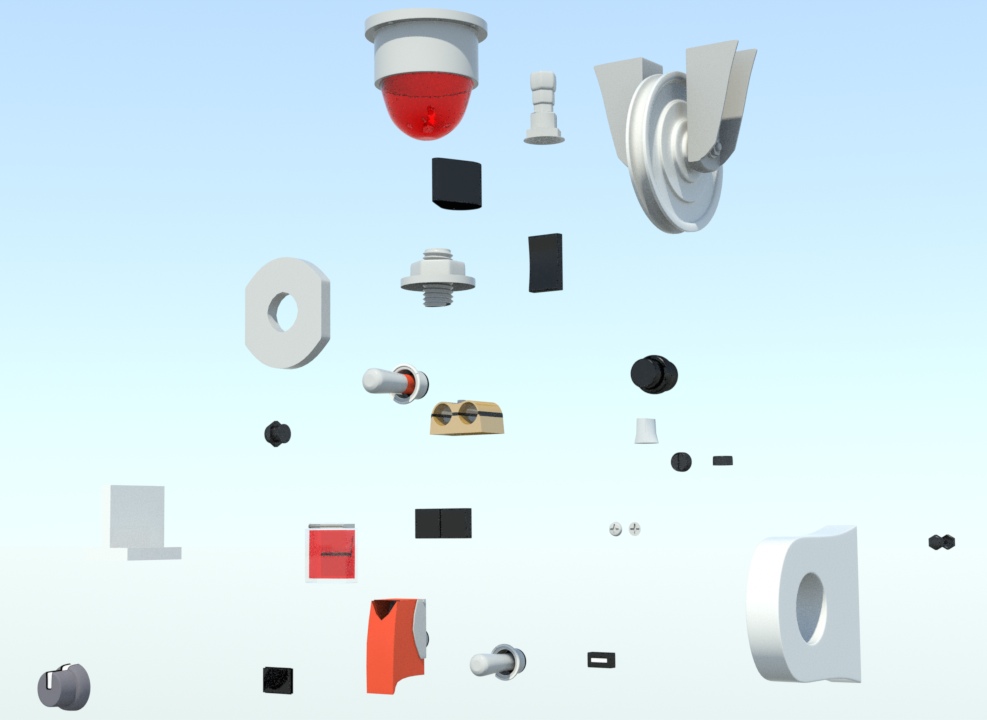
I've included a file of hardware (nuts, bolts, screws, etc.) used in the P180 project, a demo file of a "fluid flow" idea, using 801's new "Grow Curves" function, a sample of some jet parts created in MeshFusion, (MeshFusion not required to use these meshes) and a sample file which illustrates the "Ngon in the corner" method used to create some models for a customer last year. I hope you'll find these interesting and useful too.
Subjects discussed and explained:
- Extensive text, images, and video regarding the construction of the Piaggio P180 model. (All Catmull-Clark subdivision surfaces, or “Psubs”)
- Shape versus topology (Including exporting for Solidworks users)
- The “Ngon in the corner” method for fast sub-d modeling, where ngons are allowed
- Edges and edge-weighting
- Boolean alternatives you can use IF you're staying within MODO
- Sometimes "good modeling practices" means more polygons.
- Important information about Locators
- 801’s new “Grow curves” ability
- MeshFusion as a modeling tool, and for prototyping stereolithography parts (“3D printing”)
- Cockpit UVs, materials, and lighting
- Organizational groups in the Item List and Shader Tree
- How to create and keyframe a pop-up “HUD” control panel for your model
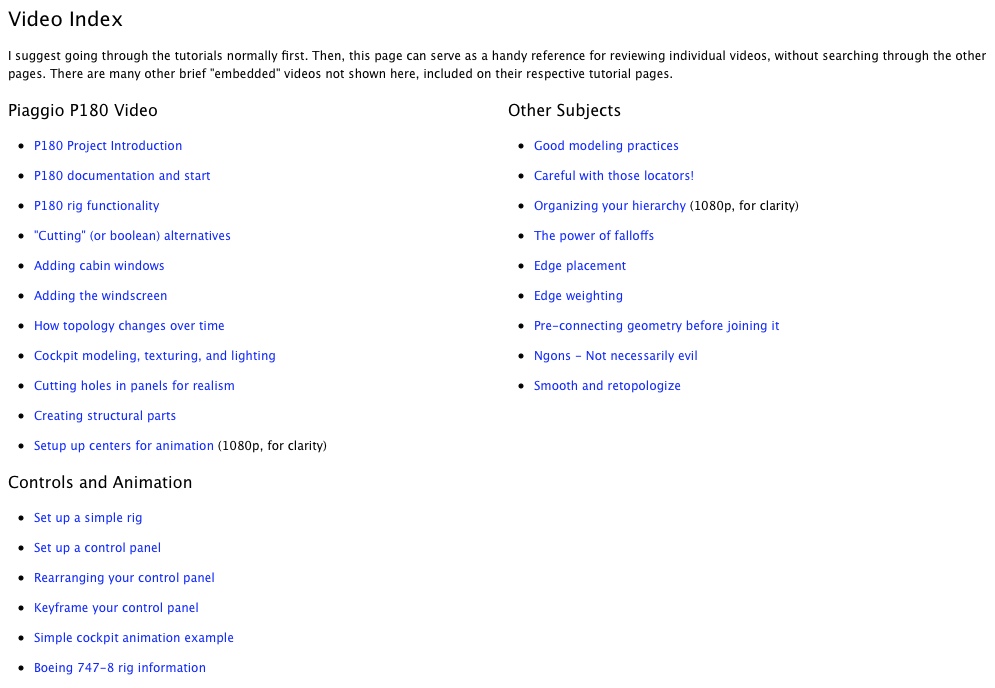
Over 24 videos included, totaling nearly 4 hours (Screenshot of the "Video Index" page below)
Timing is everything...
It's frustrating to release something intended to be helpful, and just after the release, find new information that invalidates what was said. Embarrassing for me, and less helpful to people who bought the training. In this case, I recently (2014) had three different customers who required parts exported to Solidworks. (using the "Power SubD - NURBS" plug-in for MODO) The process showed me some ways to improve that workflow, which I'd like to share with you. Finally, there were a few additions to modo in 801, and to updated plug-ins made around it's release time, that made a difference. I delayed the release of this tutorial a bit, so I could include what I learned.
Thank you!
- Mike James